Category: DIY
Motion Pictures

A big trend in photography this year has been moving photographs. Wait, isn’t a moving photograph just a video? Technically yes, however, photographer Jamie Beck and motion designer Kevin Burg teamed up to create a new little technique that combines stills and motion into one neat little package. I first came across the moving photograph on Gilt Taste (click on the categories) and naturally had a double take. Did that cheese wrapper really just flutter? The basic idea is to take a still photograph and have a small part of the image move in a subtle way. If I was in advertising, I’d be jumping at the opportunity to put this new technique to work before everybody’s doing it.
So, Shoot From the Hipster, how exactly does it work?
Patience, grasshopper. I am here to tell you.
The secret is in the GIF. A GIF is a file format that supports animation (think of all those online ads that flip). The “cinemagraphs” just involve a lot more frames to make the transition smooth and subtle. Think in layers. A still photograph is the top layer, with key areas cut out so the video underneath peeks through. It’s almost so simple that tons of graphics folks out there are having one of those little “doh!” moments and asking themselves: Why didn’t I think of that? The answer to that question is that video people think in motion, photographers think in stills. Score one for teamwork.
The best part about the cinemagraph is that anyone with Photoshop and a camera that takes video can do it. Photojojo has a great step-by-step guide on making your own.
So are cinemagraphs just a passing fad or here to stay? As always, it’s hard to tell. This is an advertising gold mine at the moment (think of the prospect of getting an audience to double take your ad), but overuse will ultimately result in everyone ignoring the ads, subtle motion or not, like they do today. If it remains cost-effective, they will stick around regardless. Personally, I’m waiting for the first art show of shifting photographs, or a room full of images playing dodge ball with each other.
Hello, sun
Today I have the perfect little DIY project: it’s cheap, easy and old-school.
Sun prints!
Remember those blue pieces of paper you put in the sun and lay things on? In my first black and white class, our first project was the photogram. The process is nearly identical, the paper and developing solution is the only difference. I am actually going to show you how to do this both the old-school way by lying objects on the paper AND how to make a sunprint that actually looks, more or less, like a photograph. I’ve been using these as the CD jacket for my portrait clients, just for something different. This project is also good for kids. I do not have many tricks up my sleeve when it comes to entertaining children, but this happens to be one of them.
Here’s what you need:
•Sun print paper. I had a hard time finding this at any of the art supply stores in town and ordered online.
•A digital photo and the means to make it black and white, invert it, and print it off on regular computer paper.
•Objects to set on top of the paper. Objects of varying transparency tend to look a little better, just keep in mind if you use something solid all you’re gettin’ is the outline.
•Scotch tape
•Something flat and clear with a little weight to it. A piece of glass or plexi-glass is gonna be your best option. Don’t have any glass just lying around? Try using some from a picture frame. Just be careful of those sharp edges!
•A dish of water
First, for your sun print-photograph, select an image. Images high in contrast without tiny important details work best. Open the image in your photo-editing software and make it black and white. It’s also beneficial to increase the contrast pretty high. Next, invert your photograph so it looks like a negative. (In photoshop, on a Mac anyway, it’s command (apple) “i”). Then crop and re size the image to fit on your paper. I like to make it a little smaller than the paper so I can do some trimming and I don’t have to worry about the tape ripping off part of my final image.
Next, tape the image to your glass with the image showing through on the other side, and tape a piece of sun print paper over it. If you are doing both kinds of sun prints at the same time, tape another piece of sun print paper to the glass.
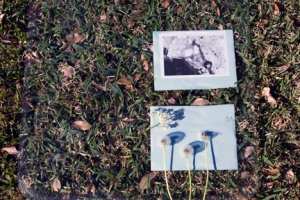
For your photogram sunprint, have your items on hand. Lay the glass in the sun, and place your objects over the blank piece of sunprint paper. You could also do a combo and try placing objects over the one you are making with a print!
Let the paper lay in the sun for 10-20 minutes. You can pull back the sun print paper to check on it if you want. This is difficult if you have things laying on top of the glass, as you do not want to move them. Guesstimation is acceptable. It’s kind of trial and error.
While you are waiting, fill a dish that your paper will fit in with water.
When you are done exposing the prints, take them off the glass and put them in the water. They really only need about 30 seconds.
Take them out and let them dry! Try not to rub or wipe anything across the print while it’s wet, it may smudge.
Note that I somehow totally messed up my first photogram attempt, so I had to do a redo. This time I used dehydrated tomatoes! You can see where I tried to put feathers on there, but they blew away. Maybe feathers are good for indoors, or smashed in between the paper and the glass.

The tomatoes turned out to be a little more on the abstract side. Blue will darken as it it dries. ©Laura Bute Photography
The sun print paper is extremely thin, almost like newspaper. For my CD jackets I spray mount them onto card stock. Sounds difficult, it’s really not. Buy some spray mount and something to put it on, poster board or card stock or whatever else you have lying around. Follow the instructions on the can.


